*Affiliate links noted in italics and provided for your convenience. For more info, see my full disclosure here.
Oh man, Friends! This may be one of my favorite projects yet!! Several months ago, my bestie, Amy, and I had sent each other pictures we found online of giant paper flowers (like this post from Maison de Pax!). Honestly, they looked intimidating and complicated, but we both thought they would be stunning in our girls’ rooms! We finally decided to get together and figure them out together. If a craft seems complicated, do it with a friend! It’s WAY more fun and you’ll benefit from bouncing ideas off of each other!
Ready to see how they turned out?! After the initial photo overload of the finished product, I swear there’s an actual tutorial in this post for how to create your own giant paper flowers! Haha!
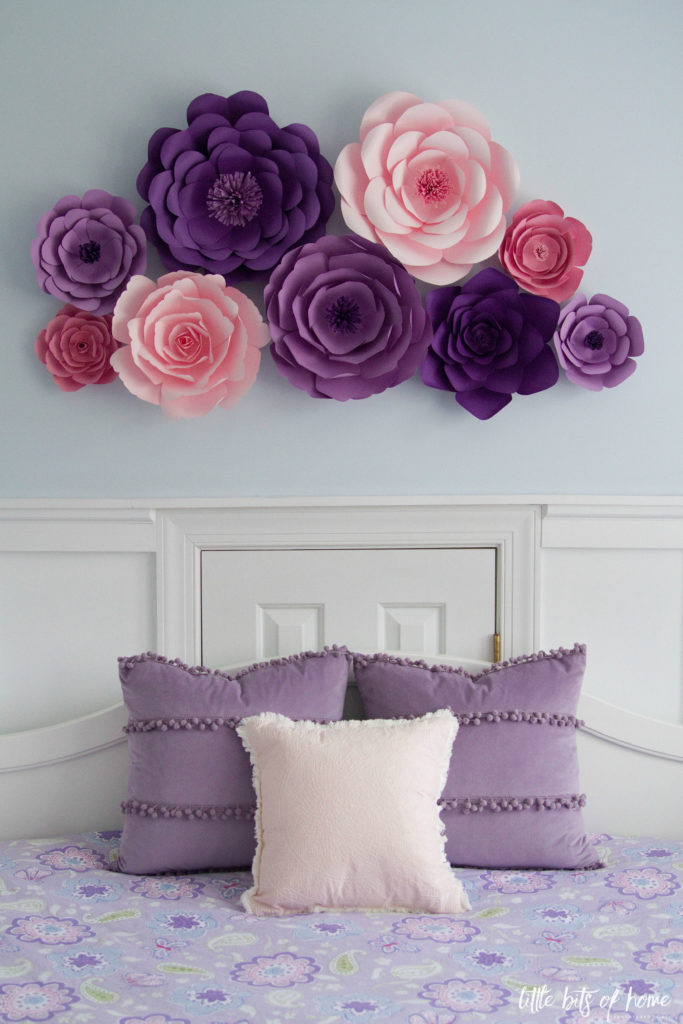
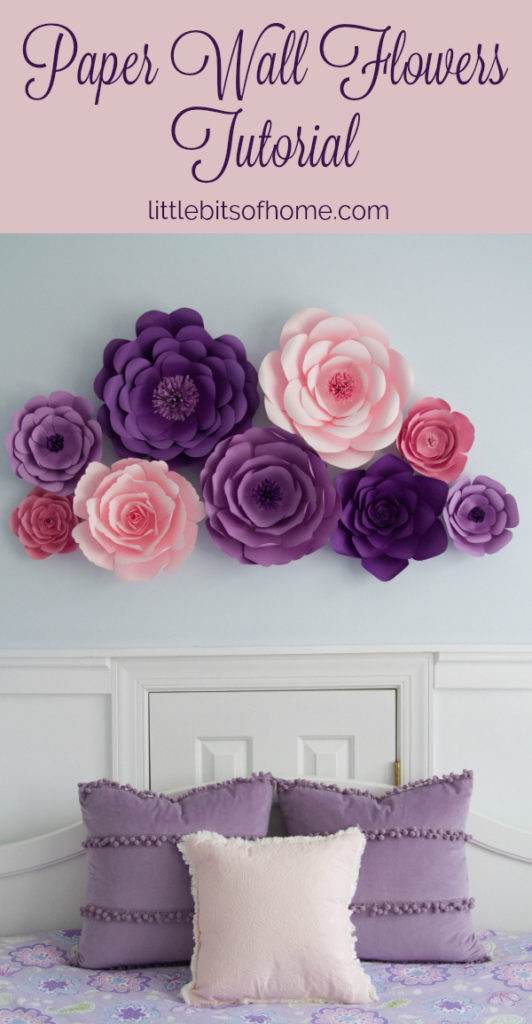
Gah, I just can’t get over how pretty they turned out! There’s so much dimension to them!
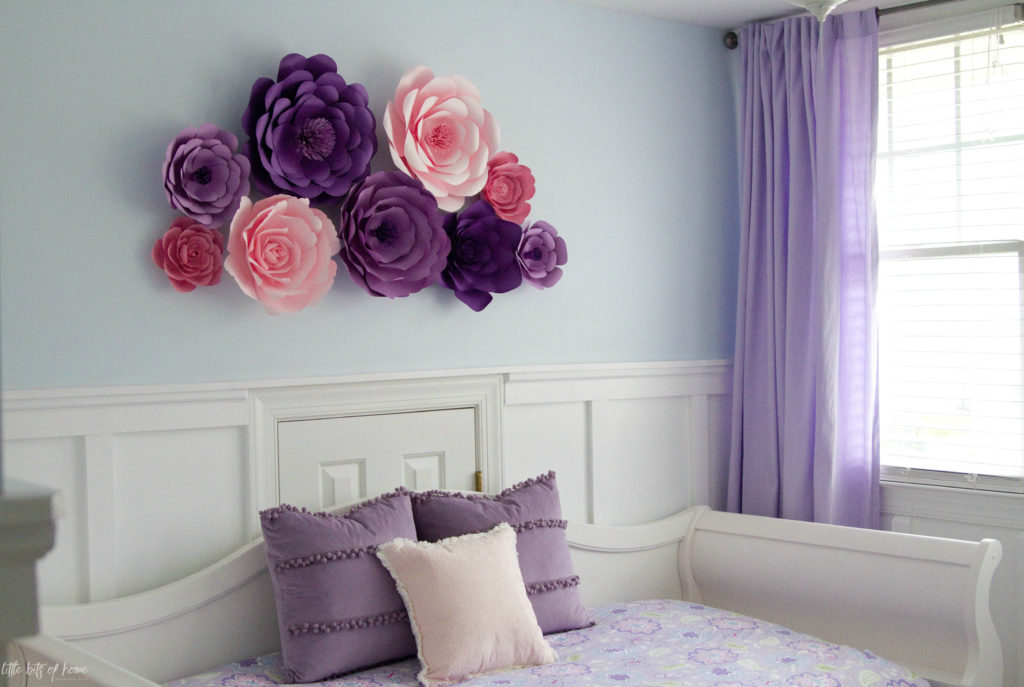
They’re really bold and feminine and make such a statement in Little Girlie’s room!
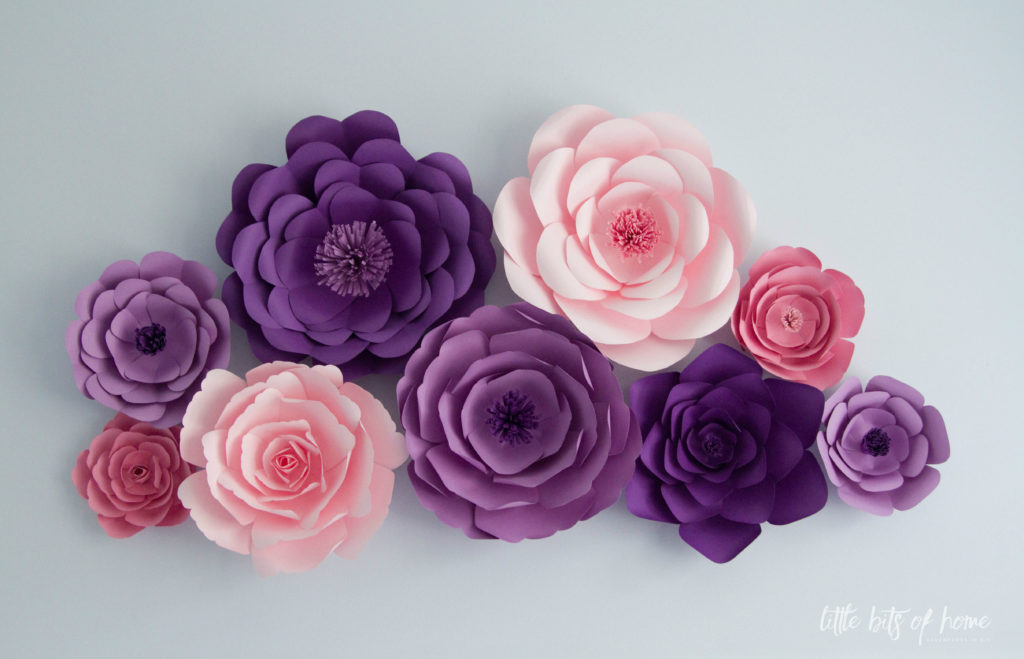
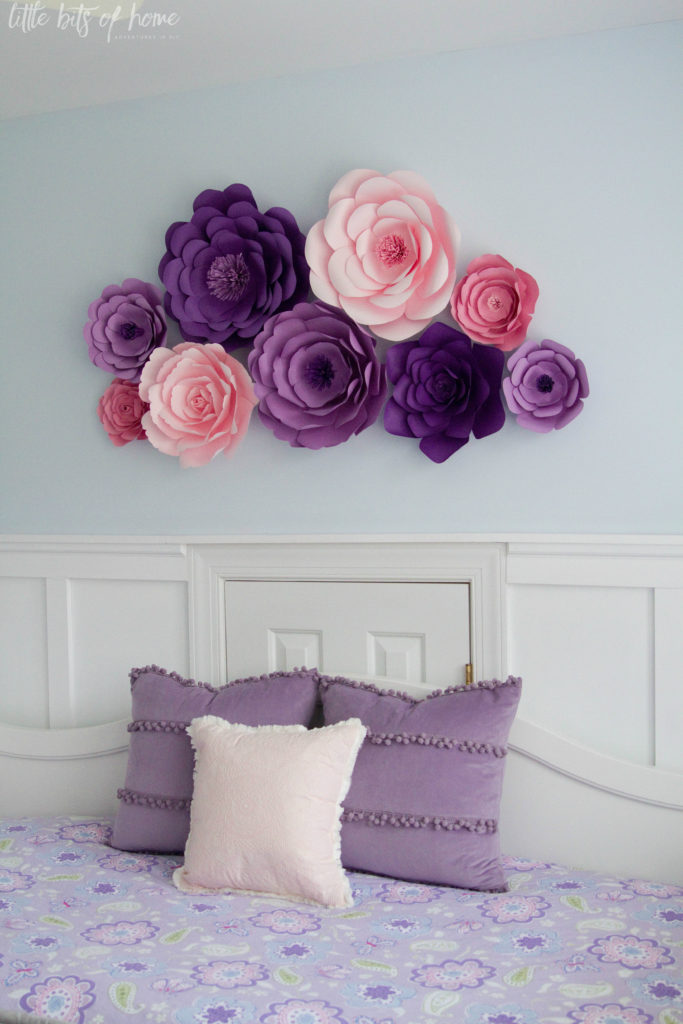
It was so much fun to craft with Amy! We were able to nail down color schemes and figure out how to complete an entire flower during our craft session. I couldn’t have done it without her help!!
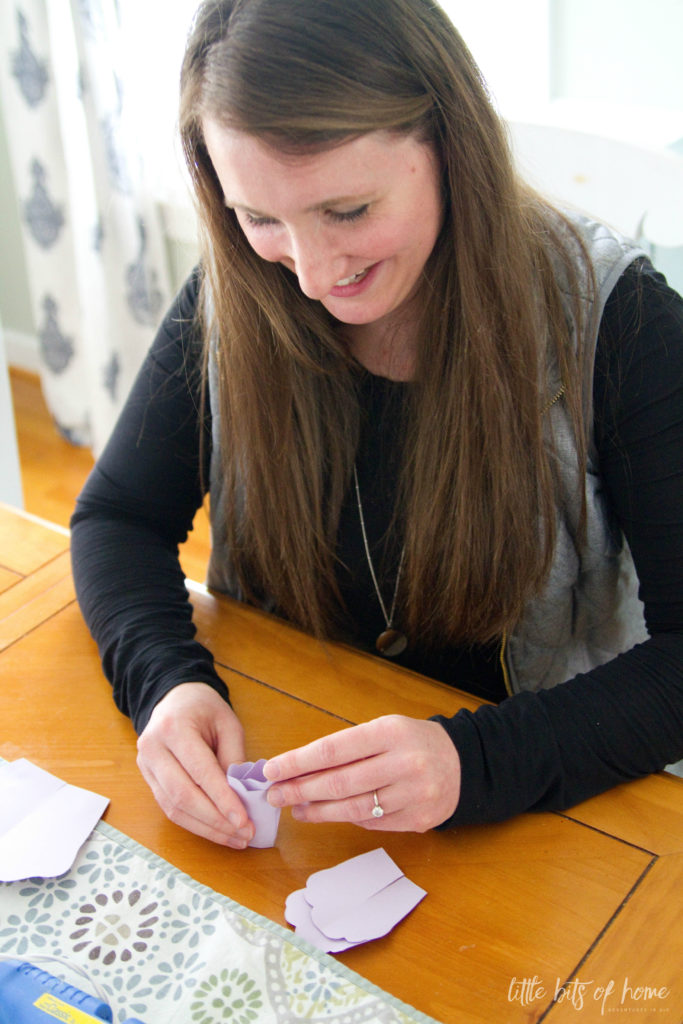
She so graciously allowed me to post photos of the flowers she did as well! Get ready to swoon, you guys!
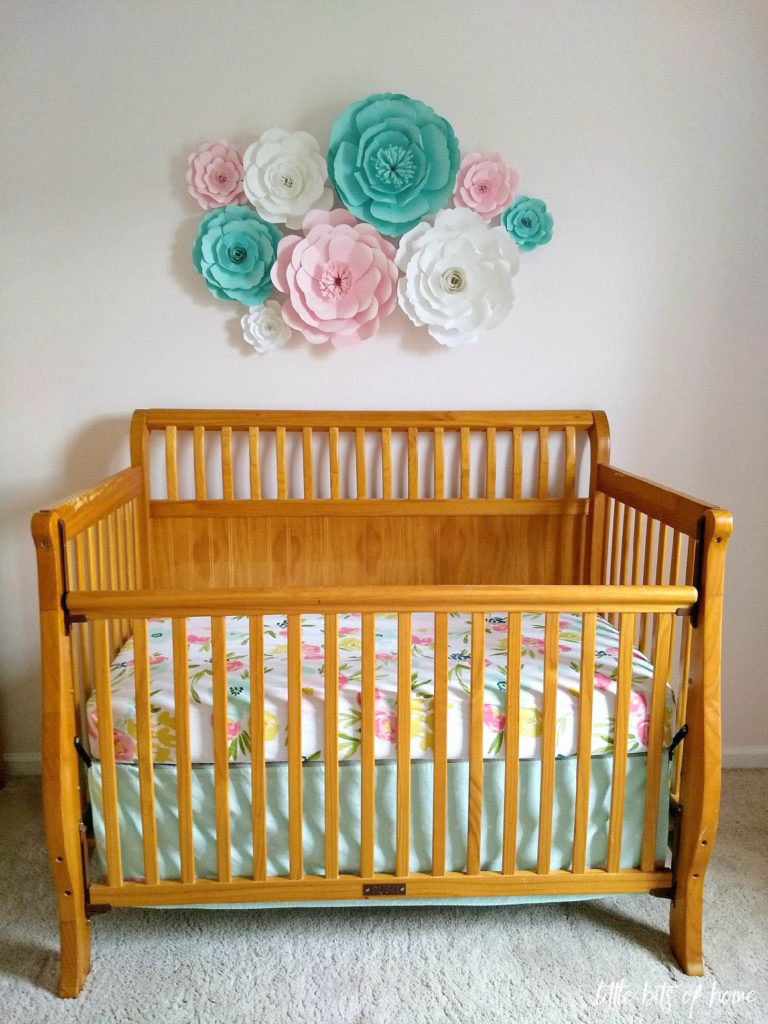
Isn’t her daughter’s nursery the most beautiful nursery you’ve ever seen?! I love the color scheme she picked for her flowers! It compliments the nursery bedding so well and is so soft and delicate!
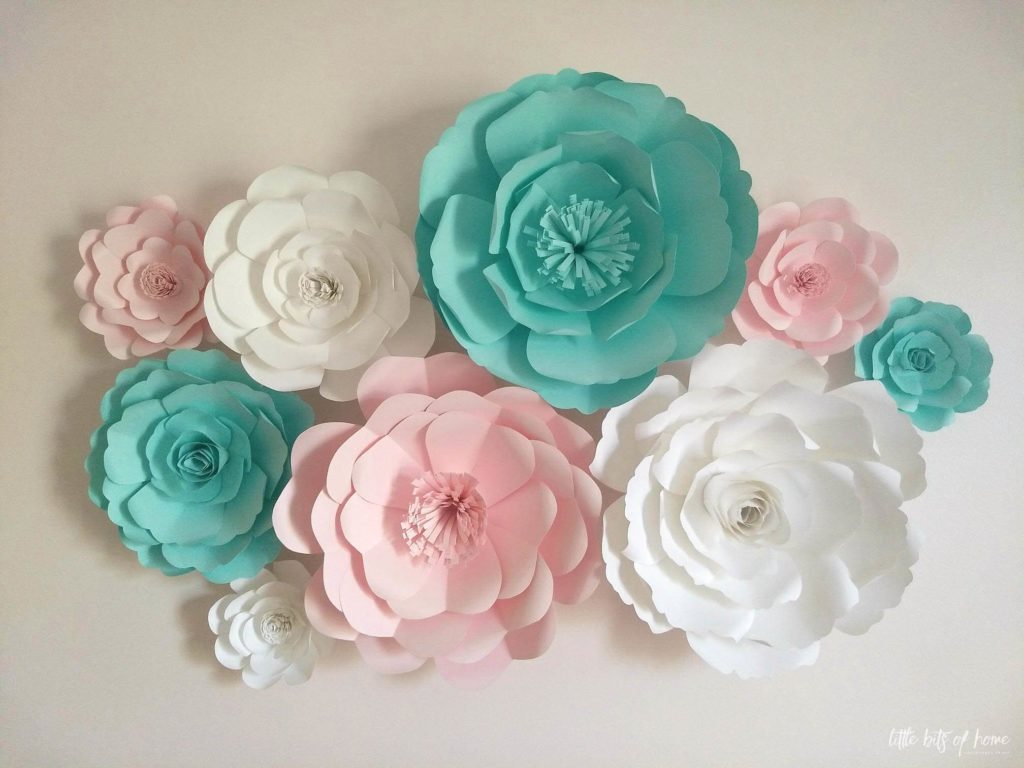
I also love how they arranged the flowers above the crib! Amy said her husband came up with this arrangement–kuddos, David!
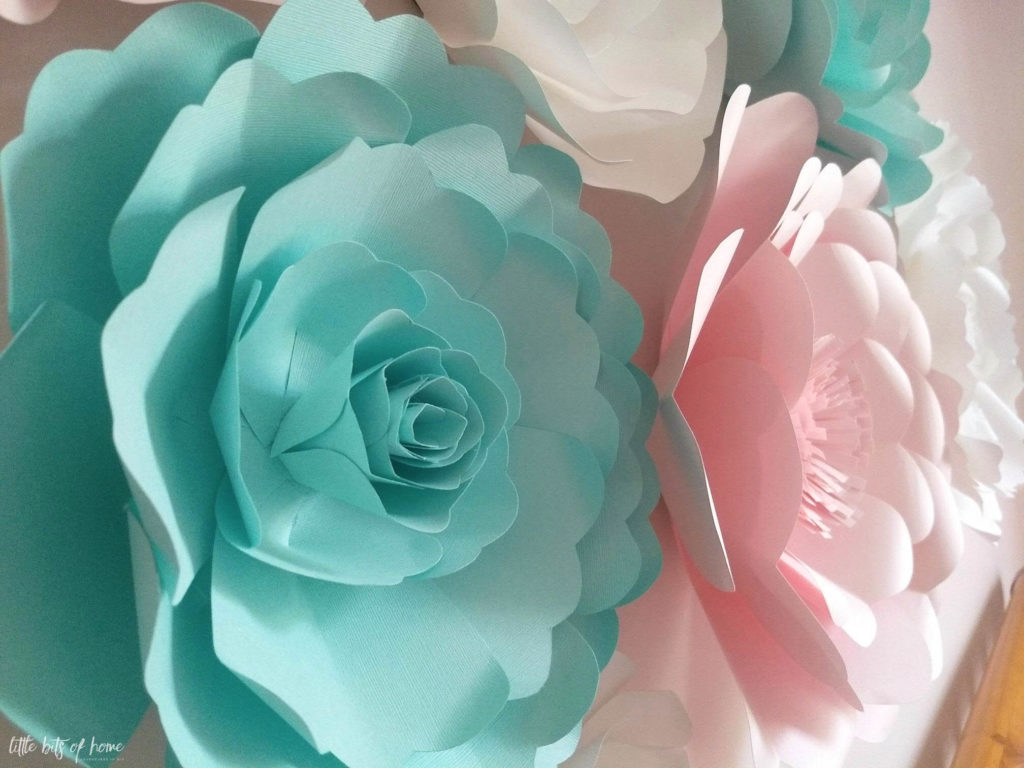
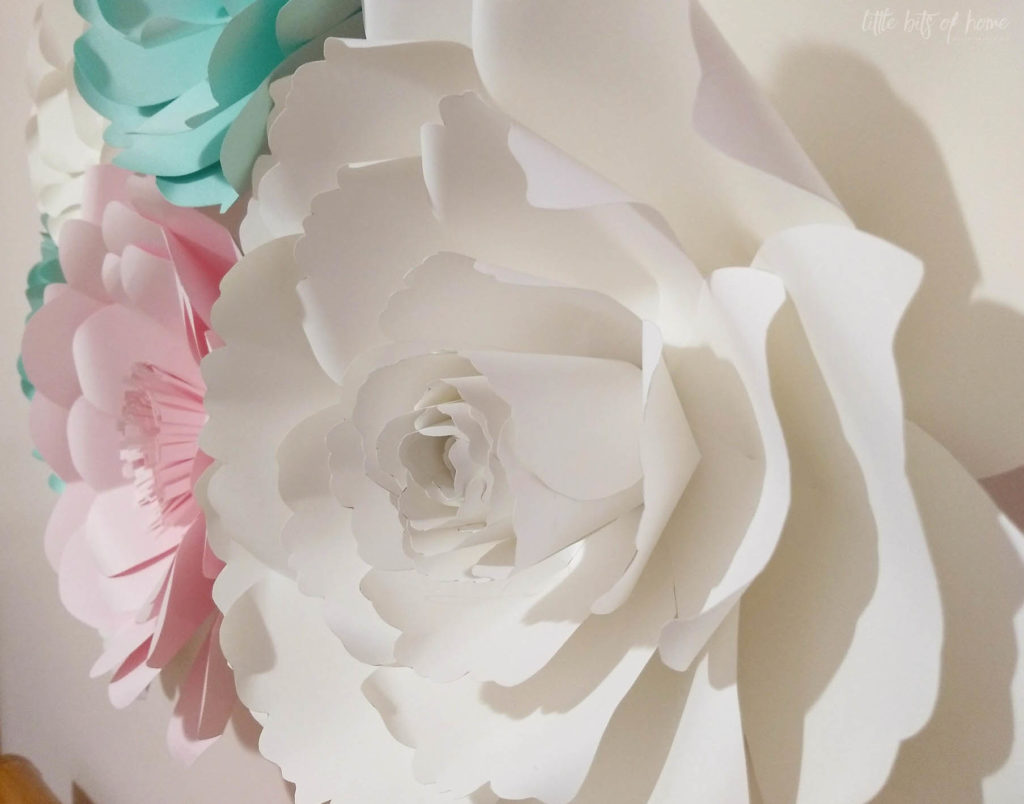
Close ups of Amy’s…
And more close ups of mine…
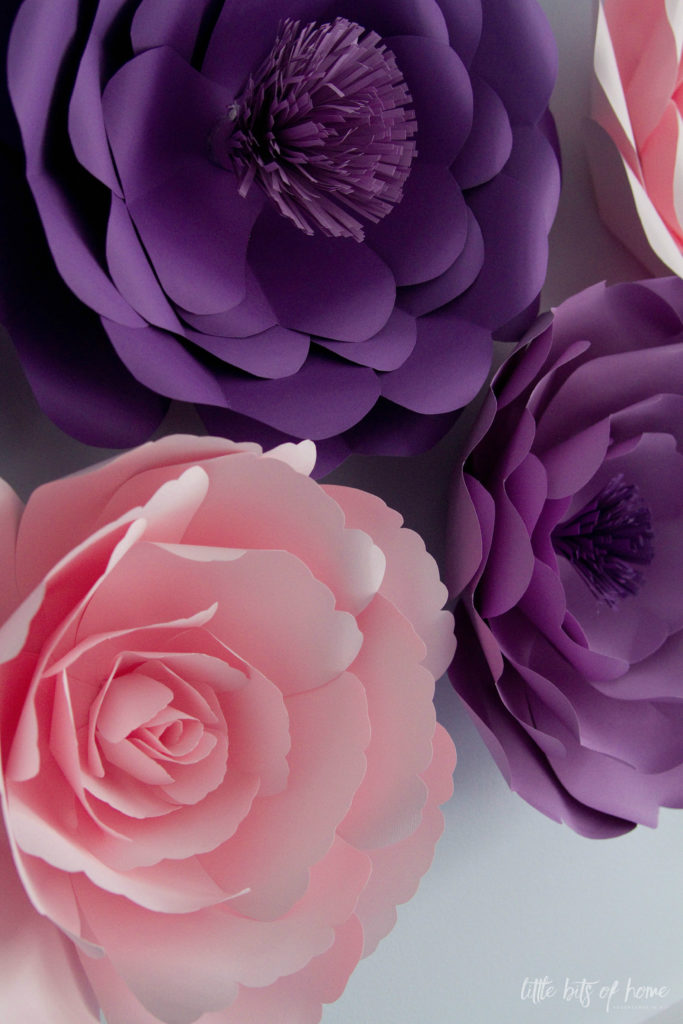
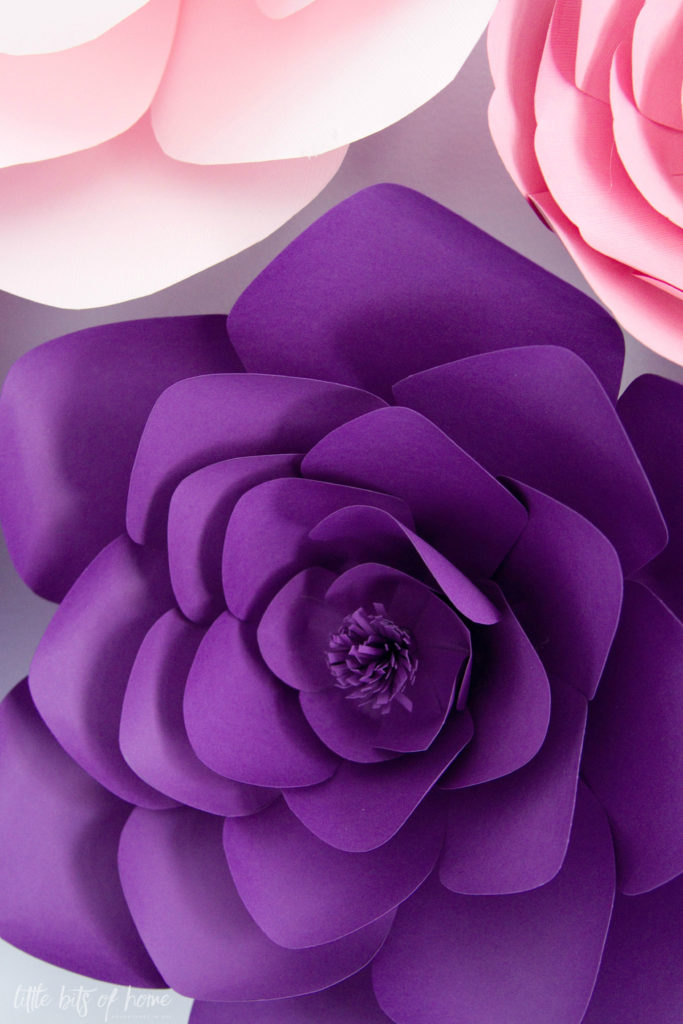
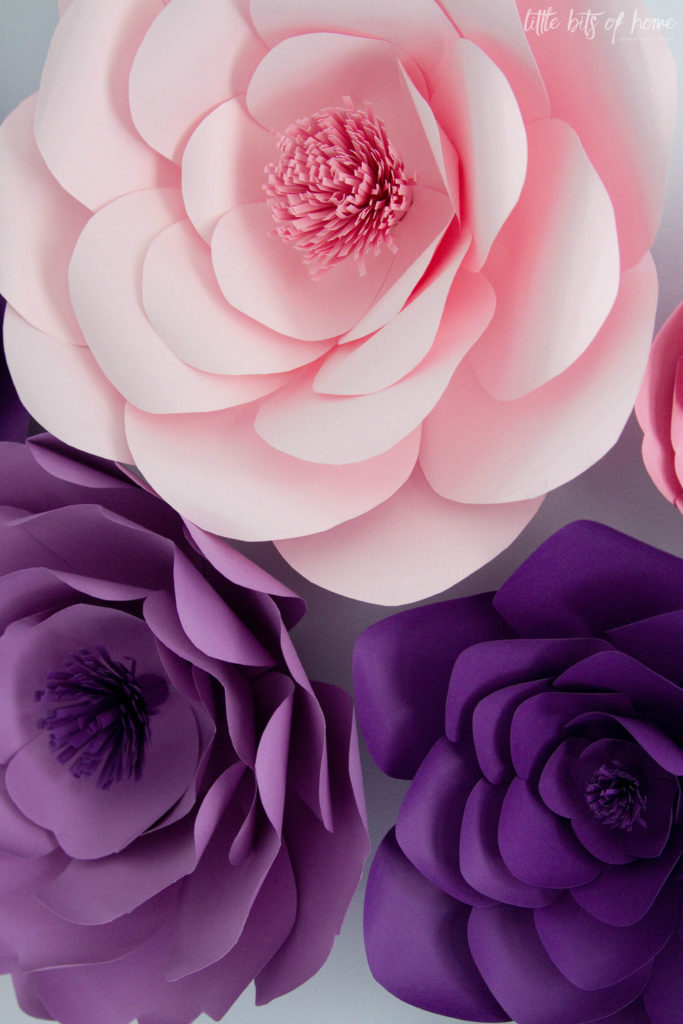
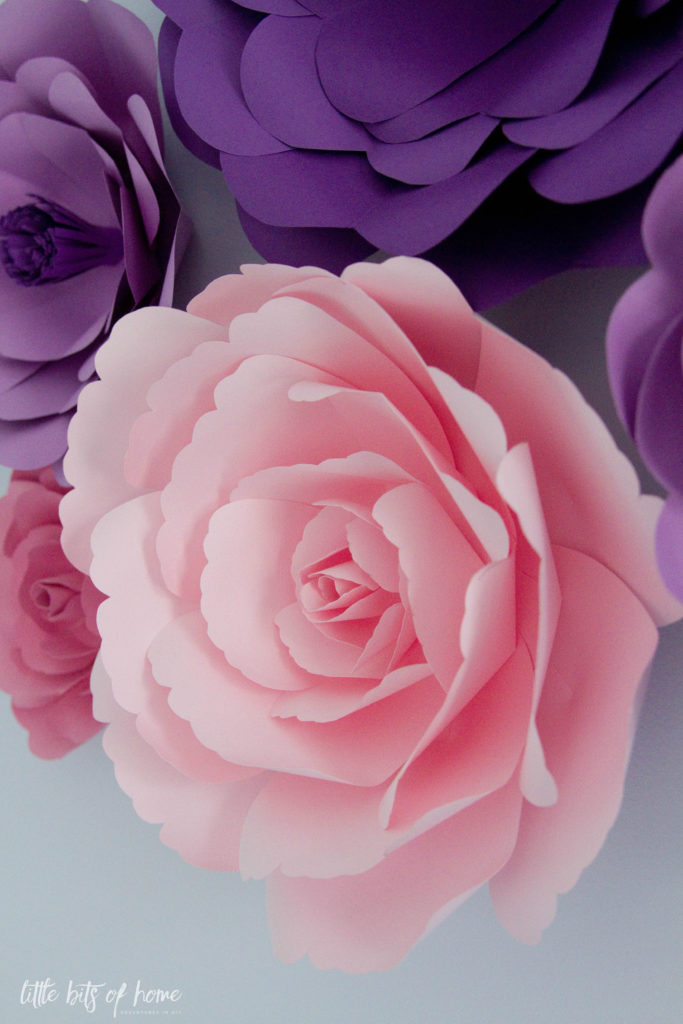
Aren’t the gorgeous?! They weren’t terribly expensive, but I will say, they took a ton of time. The large flowers take about an hour and a half, the medium and small ones are obviously less, but don’t expect to finish any size in less than 45 minutes… When I have a long project like this, I usually binge watch Friends while I craft. 😉
Ok, on to the tutorial!
Supplies Needed:
Cardstock Paper– We used mostly paper from Michael’s, some loose cardstock and some from a pack. I used these packs of purple and Amy used a pack of white. We got them on sale for only a couple dollars per pack (the purple packs were 3 for $10!), so be sure to look for sales at Michael’s and stack with a coupon!
Pencil
Time. Lots and lots of time. 😉
Directions:
Pick a flower shape and size. I have put a petal patterns and a sizing guide at the bottom of this post to help you with petal shapes and sizes. Trace and cut your petals and a circle for your base. For this tutorial, I am making a medium sized flower.
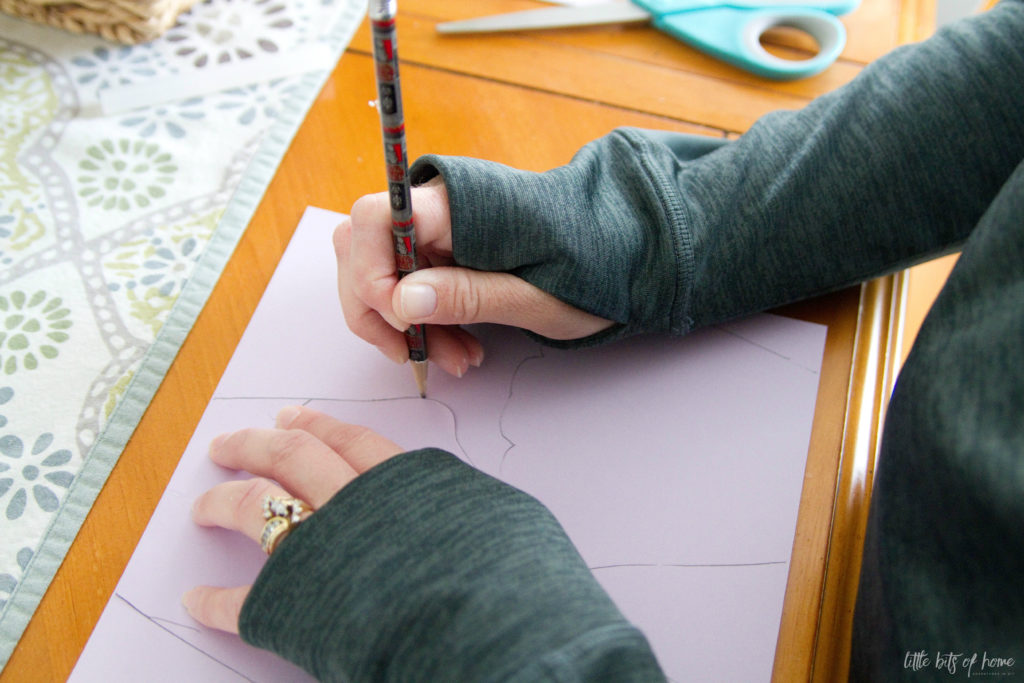
Cut a slit in the bottom middle of each flower petal going up the petal about 1/3 of the length.
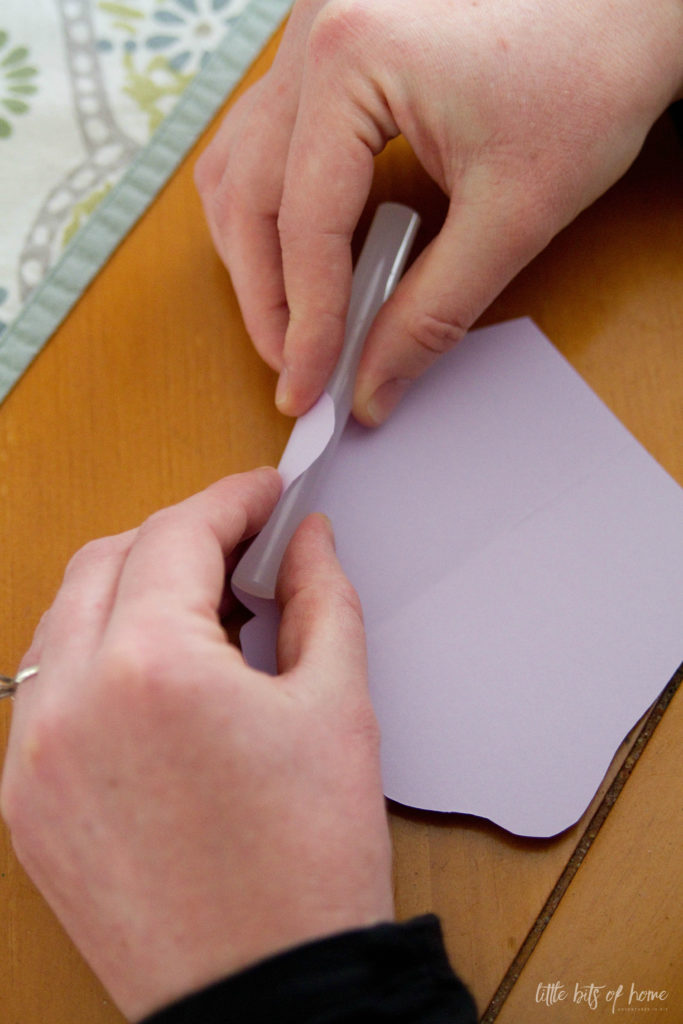
Roll the edges of the flower petals. For this flower style, we rolled one side up and one side back using a glue stick to help us roll.
To add dimension to each petal, cross the two sides of the petal and glue to secure. For the petals in the back of your flower, cross the sides just slightly. Cross the sides more and more as you work your way toward the middle of the flower. The more your cross, the more the petal will stand up. See the difference below?
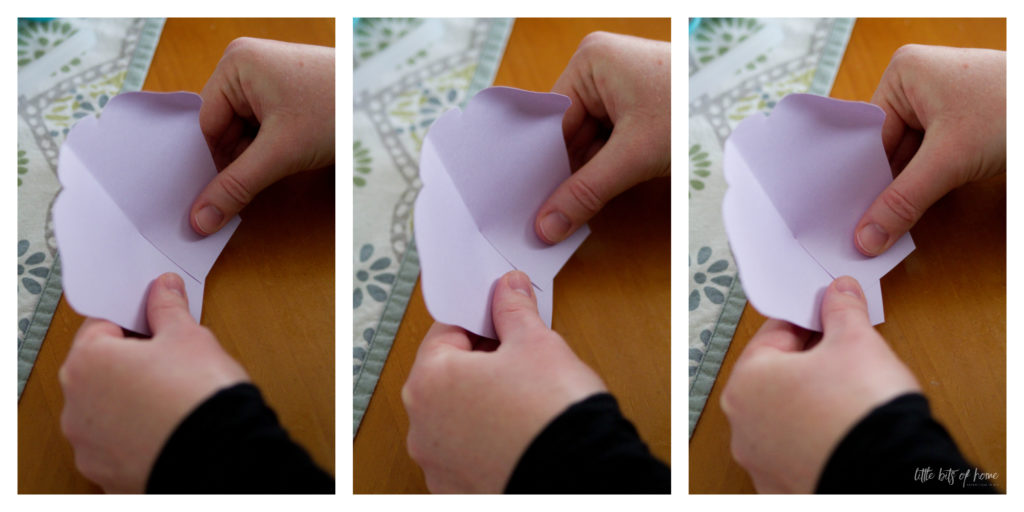
Here’s my back row of petals all crossed and ready to go.
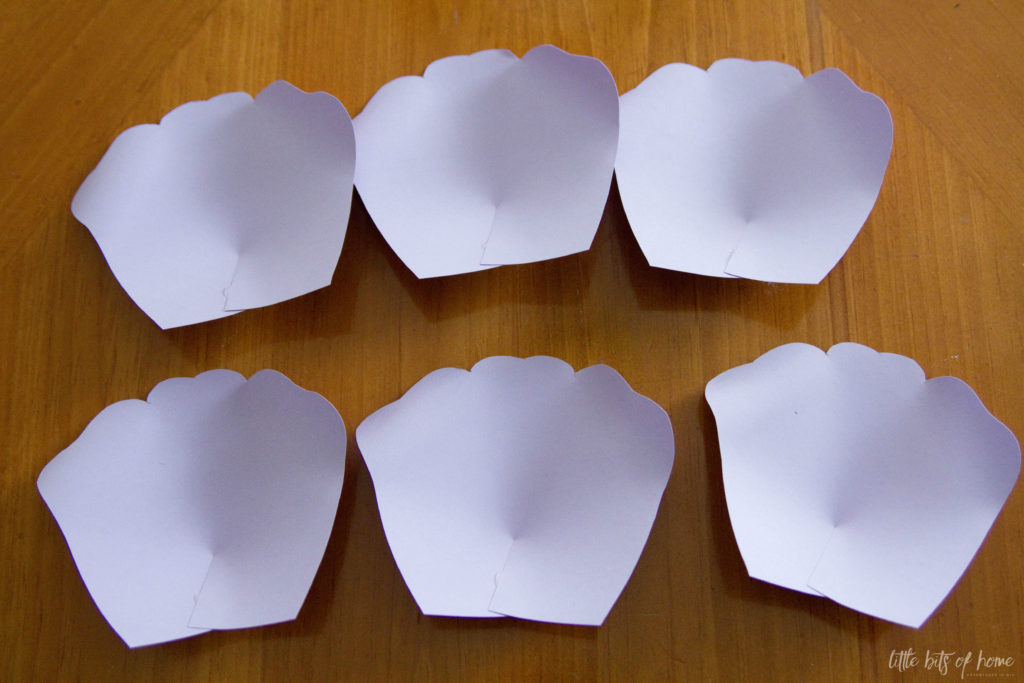
Add glue along the bottom backside of the petals and place around the edge of your base circle, overlapping the edges of your petals just slightly. Once you’ve worked your way around the circle, start in with the second row, making sure to place the petals in between the petals from the first row–see the far right picture below.

For my medium flower, I did two rows of large petals, then switched to medium sized petals for a third row, then did a fourth row using small petals.

Now it’s time to add the center! We alternated our centers between petal centers and fringed centers. The petal centers look best with the fancier petal shapes and the fringed centers look best with the simpler petal shapes. I’ll show you how to do both! First up, the fringed center!
Cut a long strip of paper slightly less wide than the length of your shortest petal. Fringe cut the paper by making skinny cuts close together, stopping about 3/8″ before the edge of the paper. Roll the fringed paper, gluing as you go to secure. Add more fringed strips until you get your center piece as thick as you’d like. It took about four 12″ strips of fringed paper for a large flower, 2-3 strips for a medium flower, and 1-2 strips for a small flower.

Once your fringed strips are rolled and glued, gently pull the strips outward to fluff the fringe.

Add a large dollop of glue to the bottom of the fringed center and glue onto the center of your flower. Done!
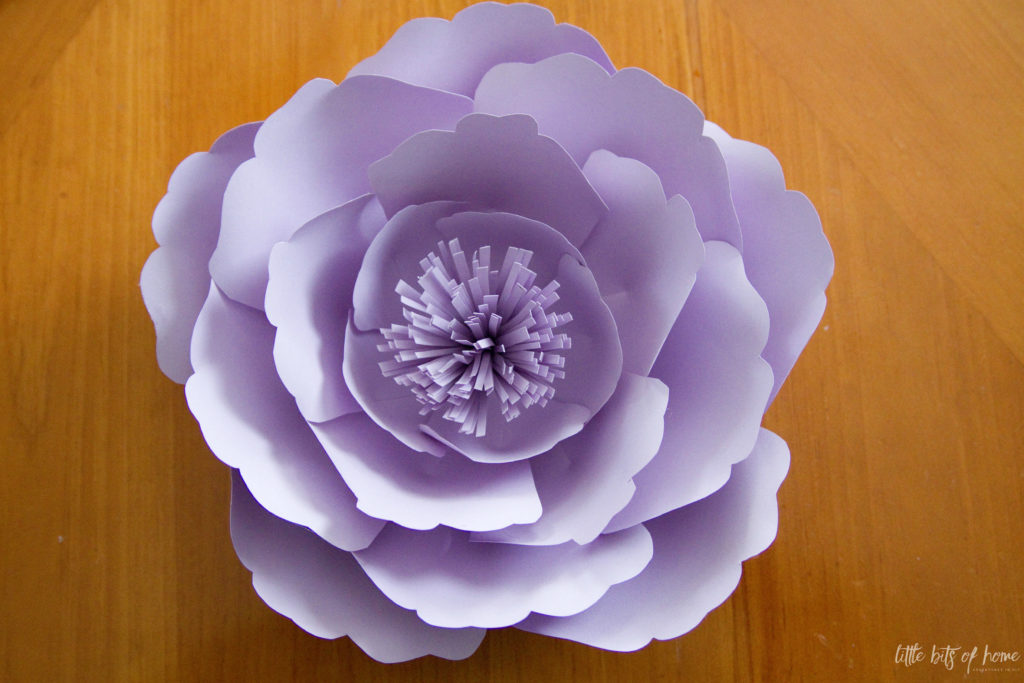
Now for look #2, the flower petal center. This one was tricky and both Amy and I threw a couple attempts away before we figured out a method that worked for us. Amy showed me how she did her centers and it was by far easier than the way I had cobbled mine together, so I’ll show you her method. Thanks, Amy!!!
Cut about 8 small petals and roll the edges like before, but do not cut the slits or add the extra dimension by crossing the side over. Roll the first petal into a loose loop and secure with glue. Loosely wrap the next petal around the first one, making sure to start from the other side so that the seams are on opposite sides, then secure with glue. Continue this process, wrapping petal after petal, each one starting on the opposite side from the last, and each one looser and more open than the last.
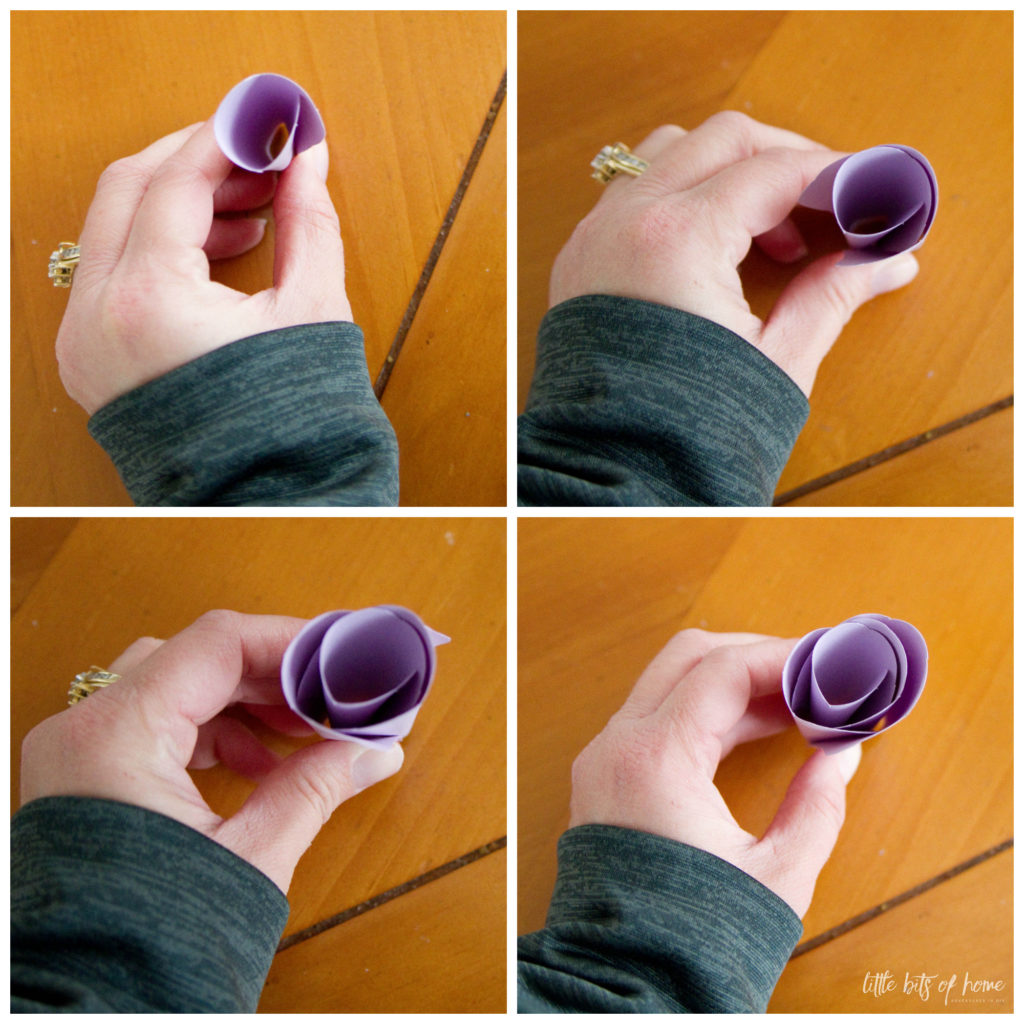
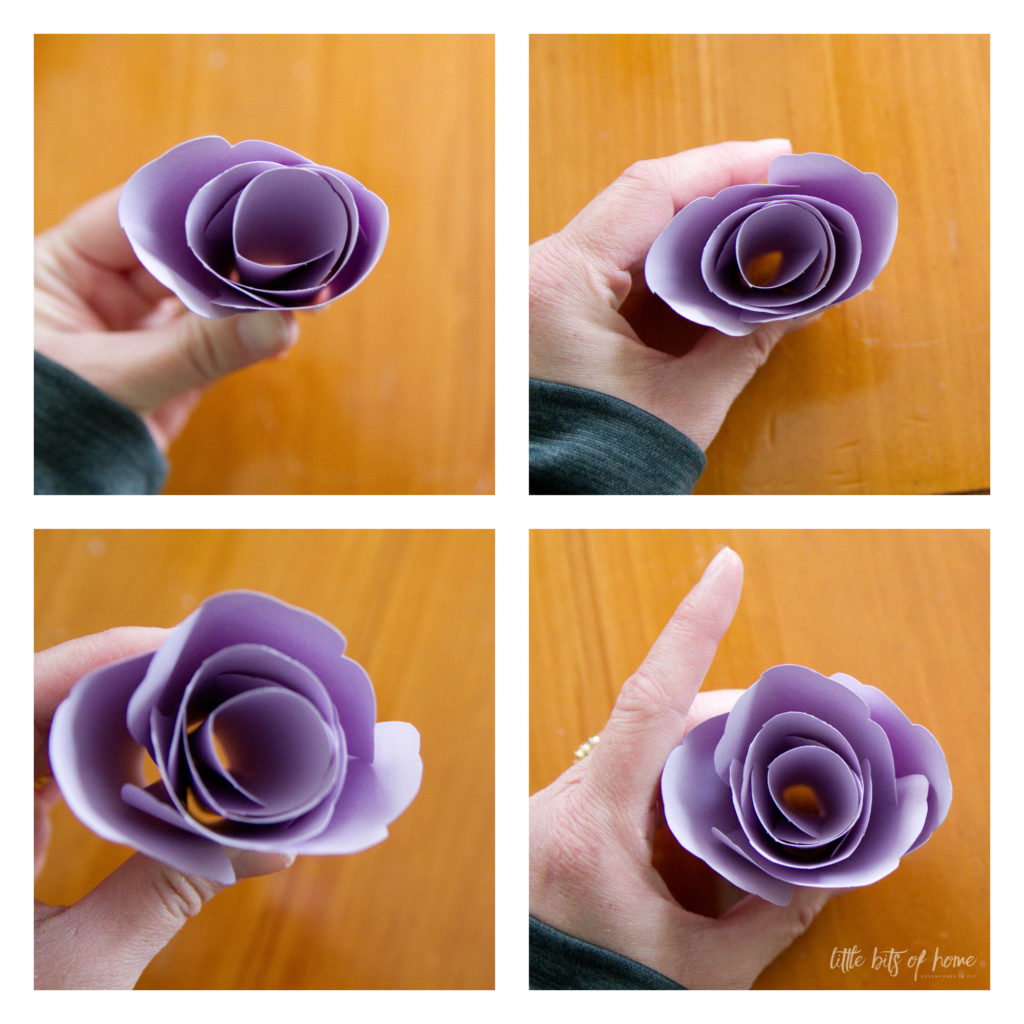
After your center is the appropriate size for the center of your flower, cut a small circle of paper and glue your center onto the circle to give it stability.
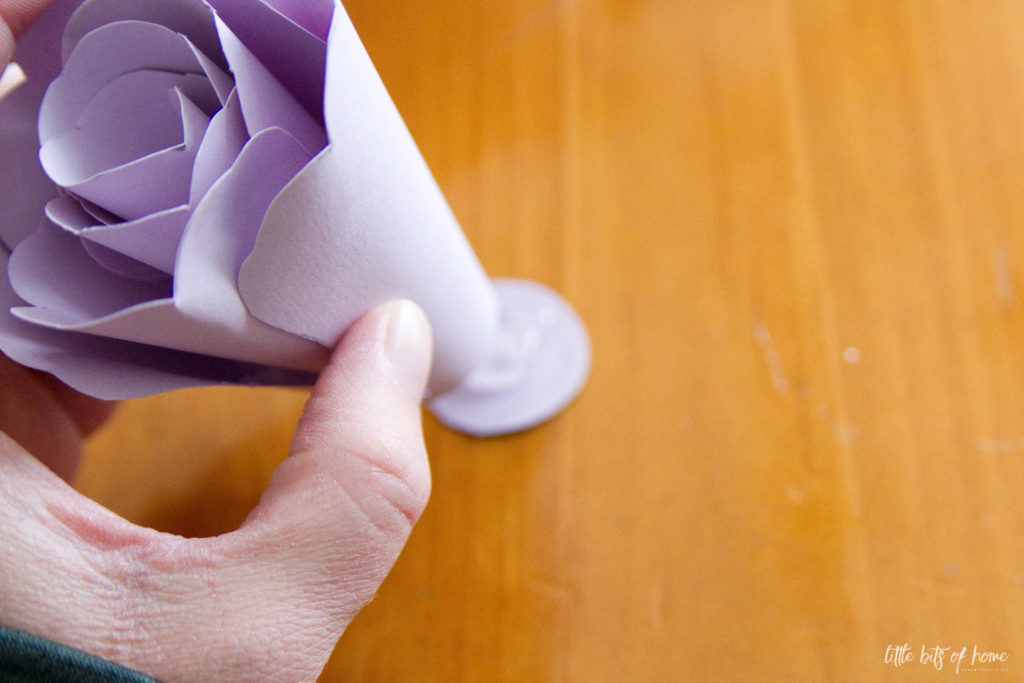
Glue your entire petal center onto the middle of your flower and ta-da! I think these look so elegant!
We used picture hanging Command Strips to hang our flowers on the wall. The large flowers took two strips for stability, but the medium and small flowers just took one.
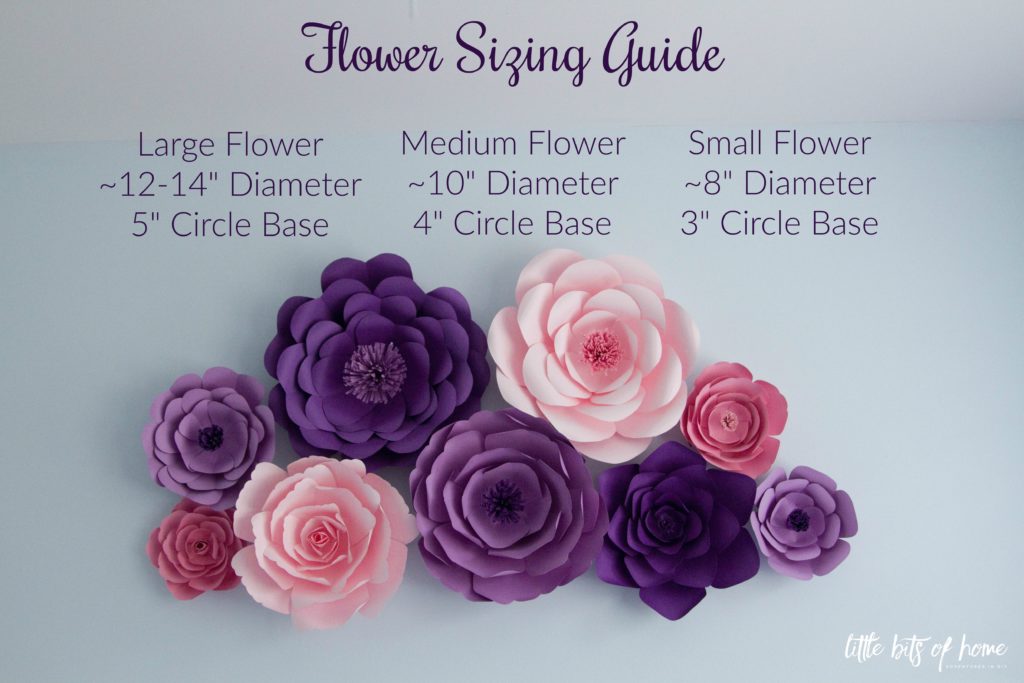
Now for the technical stuff, a petal guide as well as a sizing guide!
Petal Shape Guide
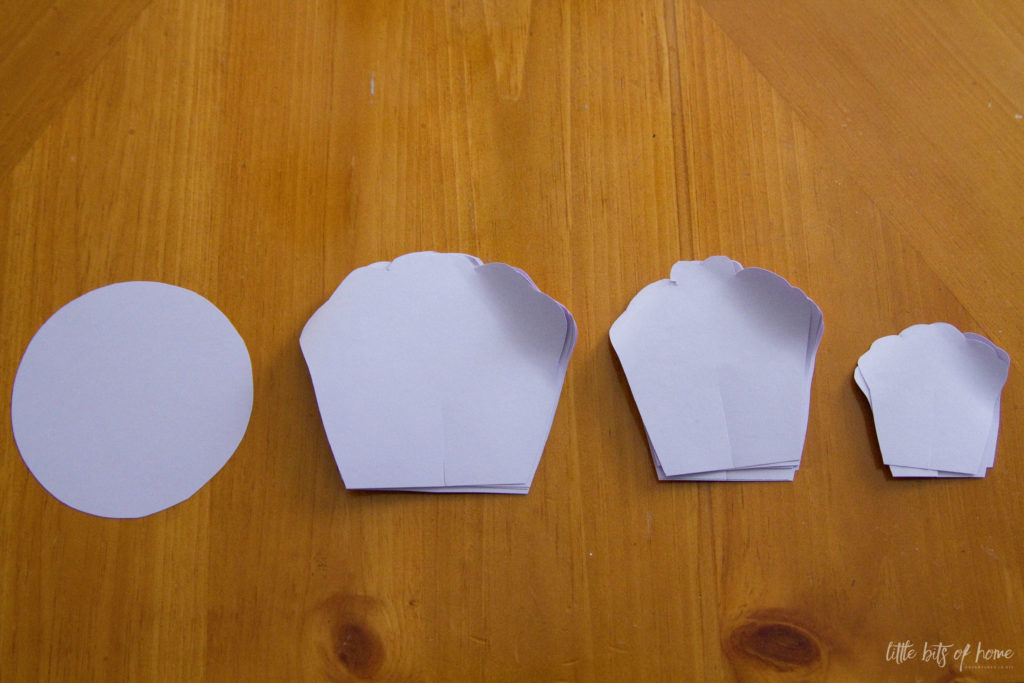
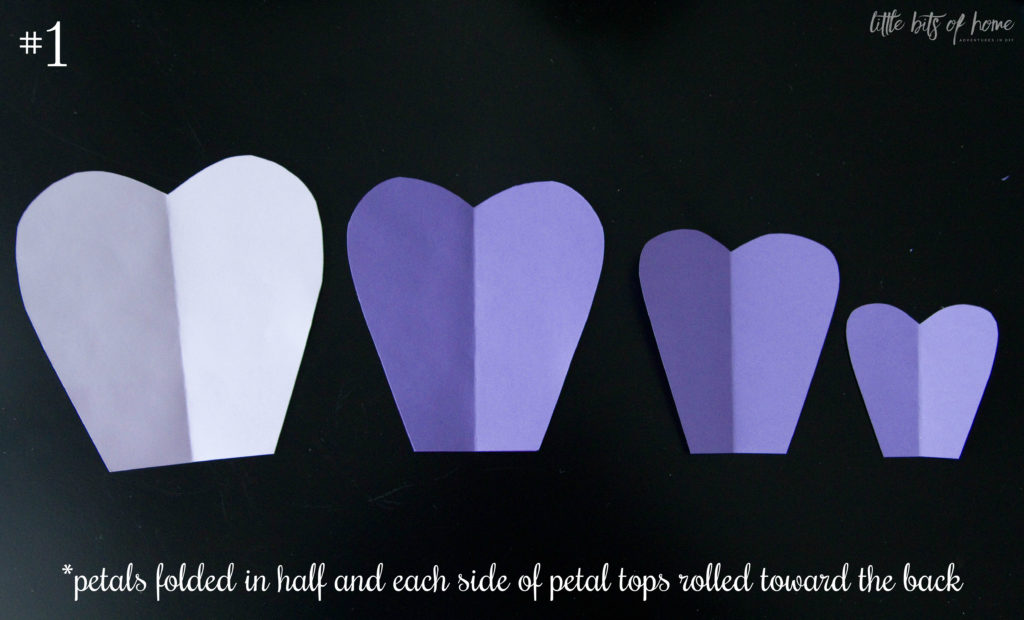
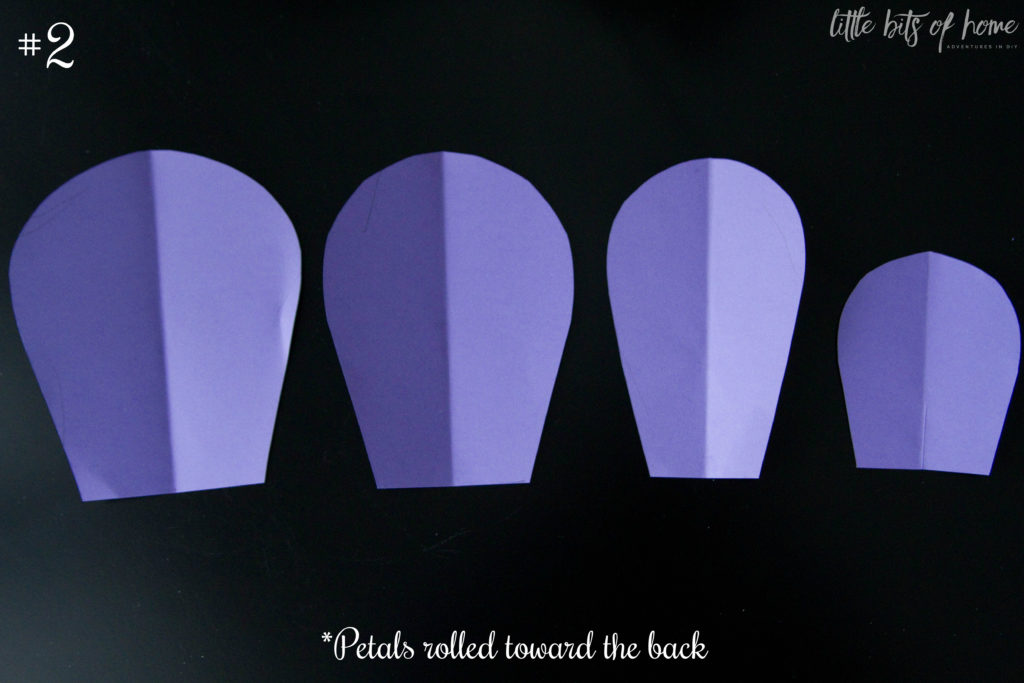
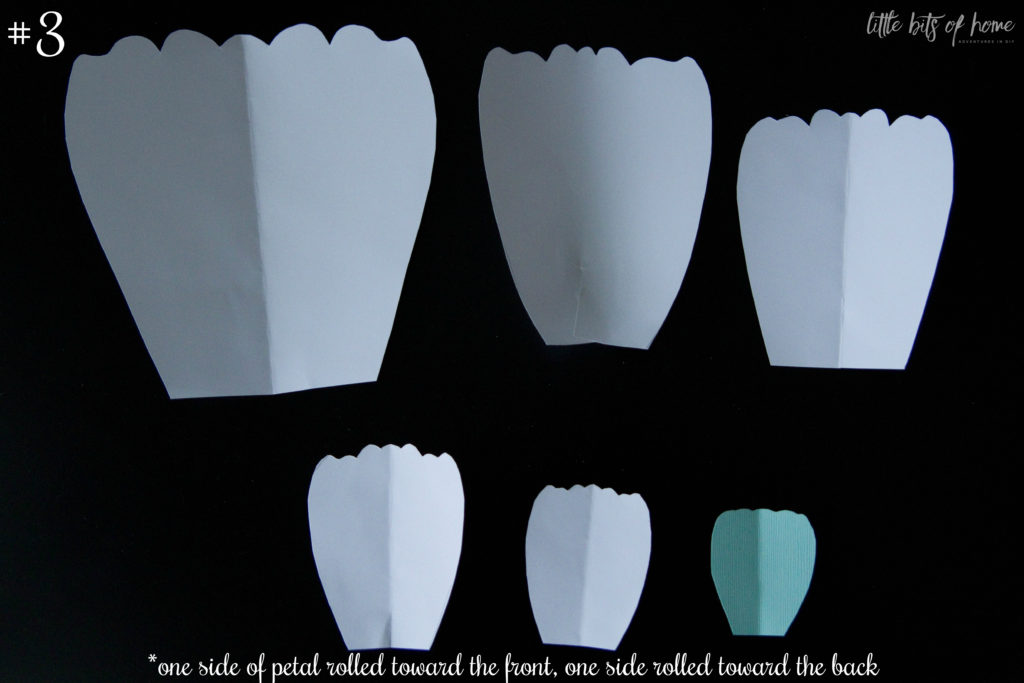
Amy and I looked at various paper flowers we found online and free-handed the shape onto a piece of cardstock paper to make our stencils. To keep our petals uniform and consistent, we folded the paper in half and drew only half of the petal and cut it out, so that both sides of the petals would be identical. Please note, while the stencils all have a crease from being folded, the only actual petals that should be folded are petal shape number one.
Don’t want to bother with free-handing stencils? I made free printable stencils for you all! Just click here to sign up for my newsletter and the stencils will be emailed to you! Make sure you confirm your email when you subscribe or you will not actually get the newsletter. Now, don’t go thinking they’re going to look all awesome and professional. I simply traced our stencils with a Sharpie and scanned them for you. But, if you aren’t into trying to create your own stencils, the printable should help you out! Make sure to print them on standard 8 1/2 by 11″ paper to get the appropriate scale.
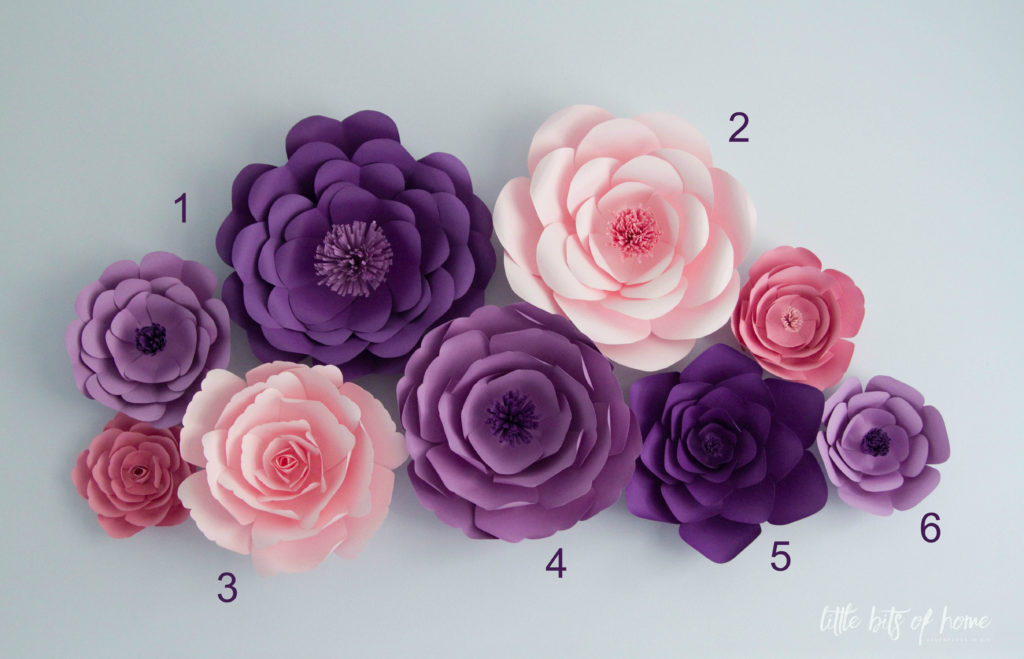
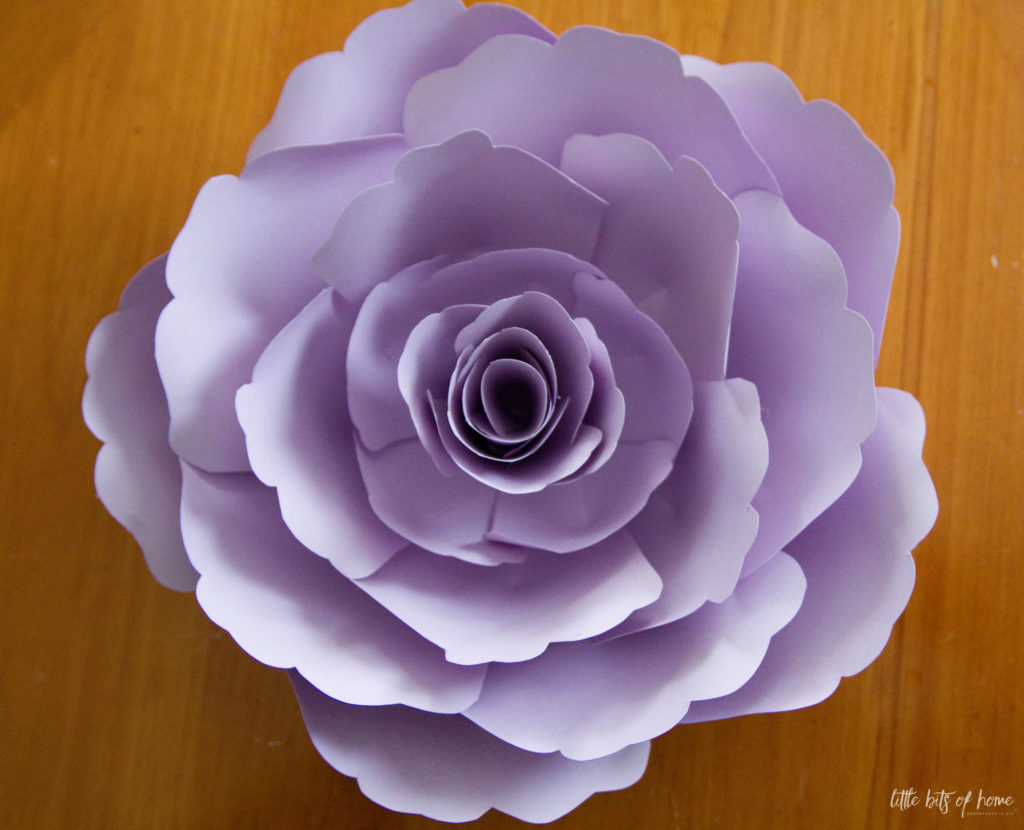
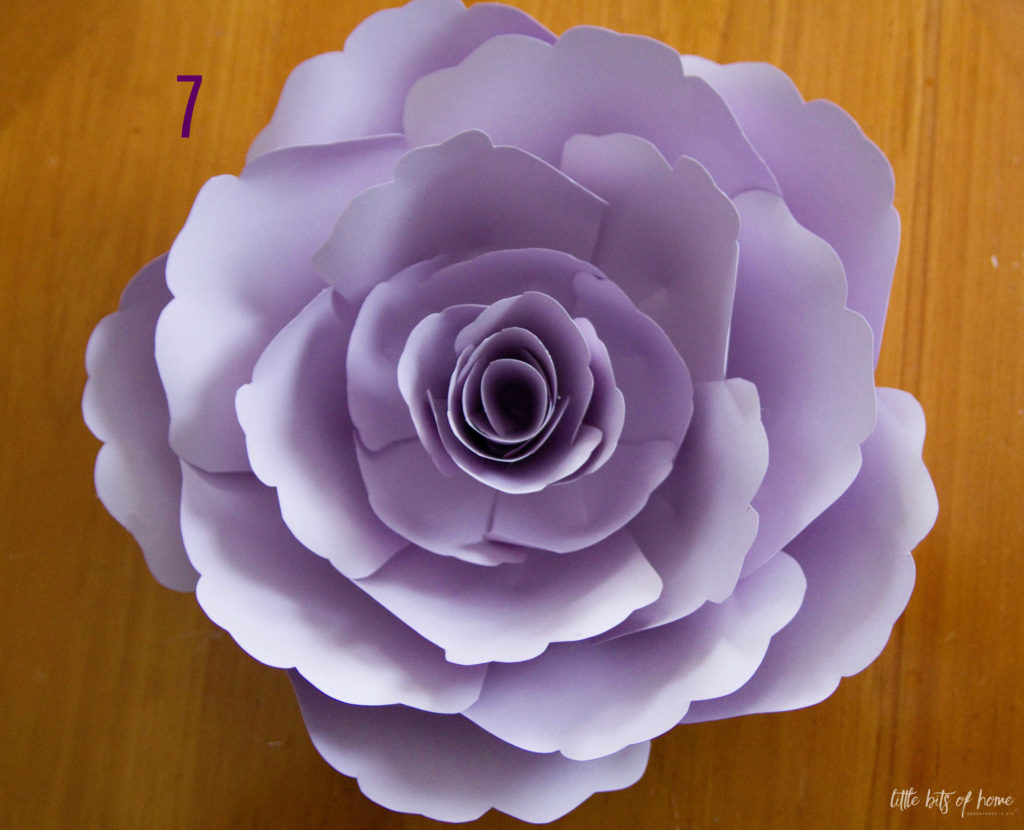
For this tutorial, I used a simpler version of #3 and really liked it!
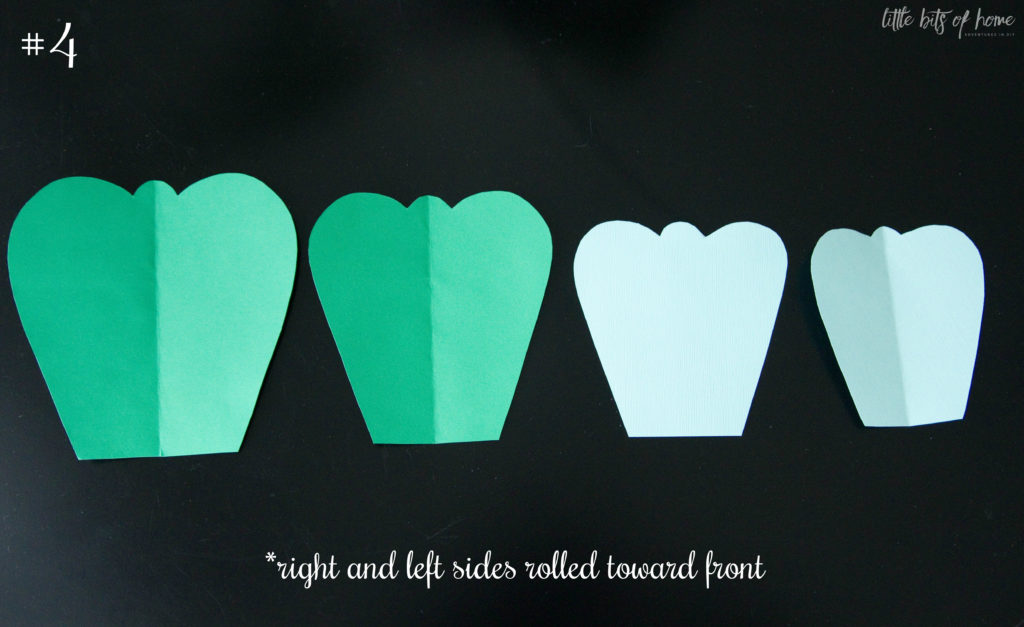
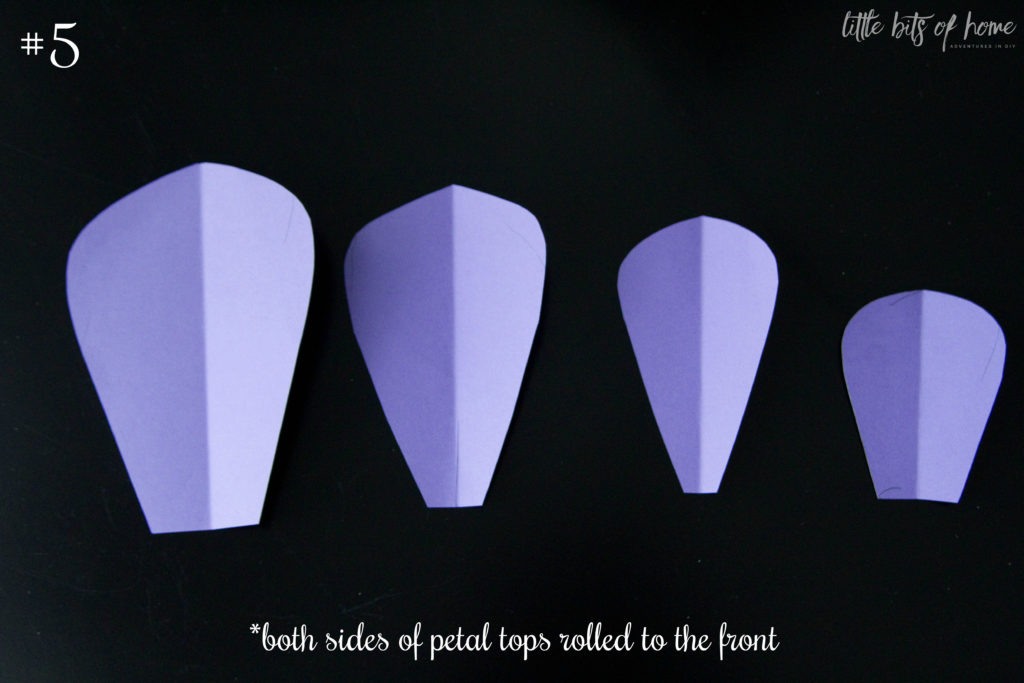
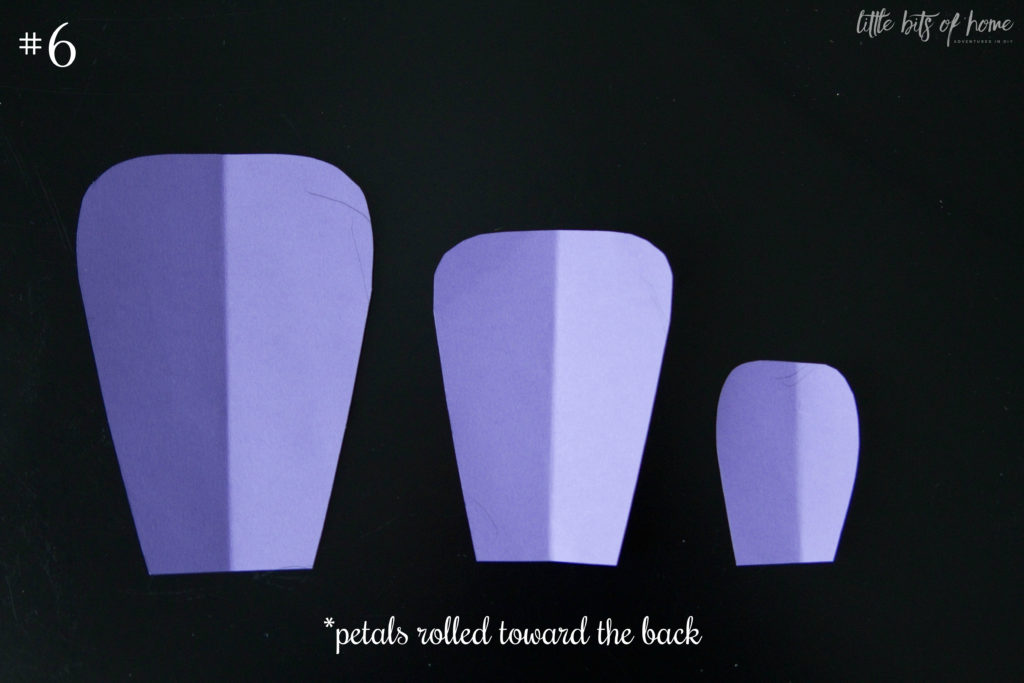
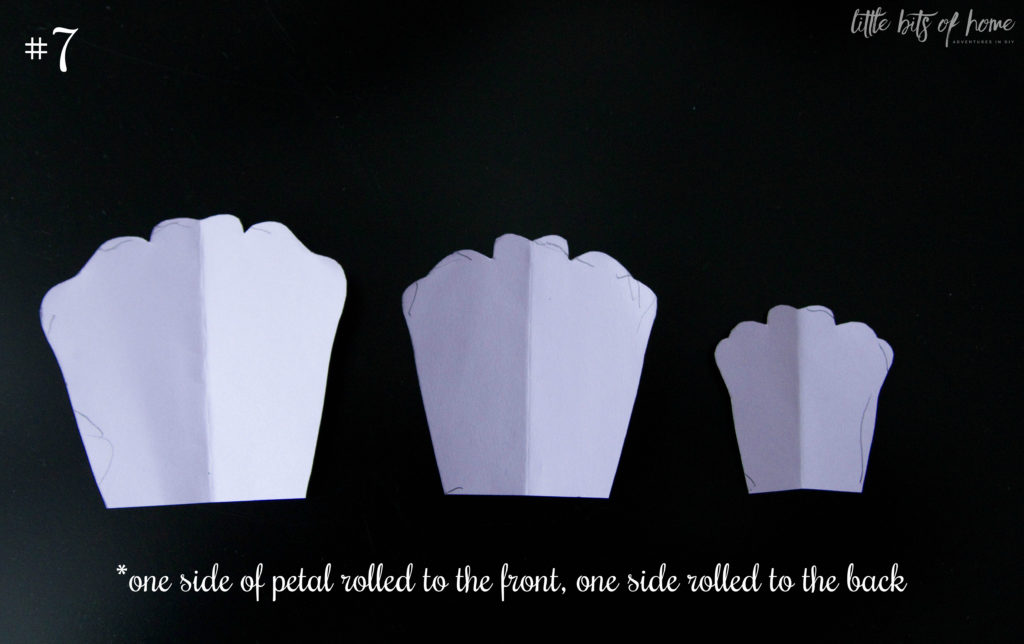
Sizing Guide
I hope this tutorial helps you all! Please comment below if you have any questions!

Oh my goodness! I just LOVE these!! Such a pretty accent for any wall. Great tutorial too. Pinned.
Thanks so much for your sweet comment! You made my day! So glad you like them!
Great tutorial. I can’t wait to make them.
Thanks, Yvonne!!
I love these!! Can you tell me how many petals of which size you did for a small, medium and large flower?
Looks gorgeous, how many sheets of paper did u use for all of them??
I’ve been looking for a template and am so excited to try this! Unfortunately, I never received the email prompt, so I haven’t gotten the templates. Can you please send them to me?
I love these flowers!!! <3 <3
can u please email me how many petals you used of each?
hello Samantha.
How many petal per row for large, medium and small?
Thank you and Amy for taking your time to share your creative flowers.
these flowers are so precious, but how many sheets of cardstocks do you need for the entire project?
How many pieces of the 8.5×11 cardstock paper did each large/medium/small flowers use, just an approximation 🙂
Many thanks, Kate
What a great tutorial
these are amazing! I can’t wait to try making them!
I signed up and never received the flower patterns in my email 🙁
I’m so sorry that happened! I just emailed it to you! Let me know if you have questions!
Could I please have the flower patterns emailed to me! I love this!
Thanks! They automatically will be emailed if you subscribe to the newsletter (see the box on the right side of the page). Make sure you have confirmed your email after filling out the subscription form. As soon as you fill out the form, an email is sent asking you to confirm your email. Follow the link & prompt to confirm your email address. The newsletter with the free printable will come as soon as your email is confirmed. Hope that helps!
I am so looking forward to trying these.
Is there somewhere that tells how many of each size petal is needed to make the large, medium flower?
These are wonderful and the tutorial is amazing! I signed up for your newsletter but did not receive the patterns. If they are still available, I would love to have them!
Make sure you have confirmed your email after filling out the subscription form. As soon as you fill out the form, an email is sent asking you to confirm your email. Follow the link & prompt to confirm your email address. The newsletter with the free printable will come as soon as your email is confirmed. Hope that helps!
I signed up and never received the flower patterns in my email
Make sure you have confirmed your email after filling out the subscription form. As soon as you fill out the form, an email is sent asking you to confirm your email. Follow the link & prompt to confirm your email address. The newsletter with the free printable will come as soon as your email is confirmed. Hope that helps!
I subscribed but did not get an email with the petal templates.
Make sure you have confirmed your email after filling out the subscription form. As soon as you fill out the form, an email is sent asking you to confirm your email. Follow the link & prompt to confirm your email address. The newsletter with the free printable will come as soon as your email is confirmed. Hope that helps!
These turned out great! I was in search of which paper to use, they don’t look like ordinary card stock…. I was going to use my cricut, but you made it look easier to do by hand… I can’t wait to try! Thank you!
It’s scrapbook paper which doesn’t fade like ordinary cardstock. Hope that helps!
Coul Ltd I get the pattern sizes emailed to me???
They automatically will be emailed if you subscribe to the newsletter (see the box on the right side of the page). Make sure you have confirmed your email after filling out the subscription form. As soon as you fill out the form, an email is sent asking you to confirm your email. Follow the link & prompt to confirm your email address. The newsletter with the free printable will come as soon as your email is confirmed. Hope that helps!
These are gorgeous!! I am diving into this today!! Thank you for the descriptive tutorial. Is it possible to find out how many of each petal you used per row in the various flowers?
Thanks! I mostly did one petal size per row starting with the largest petals and ending with the smallest. How many petals per row all depends how big you’re wanting your flowers to be. I feel like for the most part, I started with around 6 large petals on the outermost row and then worked my way in gradually getting smaller petals row by row and eventually dropping down to less petals per row. Just lay each row out first and see how you like it, then glue when you get it how you want. I’m sorry it’s not super exact, so it’s hard to tell you specific number! I promise it’s not hard and I’m sure yours will look amazing!
Thank-you so much for this amazing tutorial. My girls and I are constantly referring to your great instructions! So appreciate your hard work!
How did you attach them on the wall?
I used the velcro picture hanging command strips. Easy peasy! 🙂
hi! i see above you said the email with the patterns should automatically be sent once the email is confirmed, but i haven’t gotten them yet! just wondering if you would be able to pass them along to me! cant wait to see what else comes along in your newsletter! thank you!
I’ve been searching for a tutorial, and this looks amazing! I tried signing up, but I never got anything in my inbox. CAn you please send me the template? thank you!
I never go the link to confirm my email-it is- savagejeanne12@gmail.com please send me the patterns my friend is only 19 and i am fixing her nursery she cant afford anything-so we are using my budget thanks so much!!
Omg! These are gorgeous I’m not crafty at all but I’m definitely going to try to make them! Thanks for the great tutorial 🌼🌸
Thanks so much! I know yours will be gorgeous!