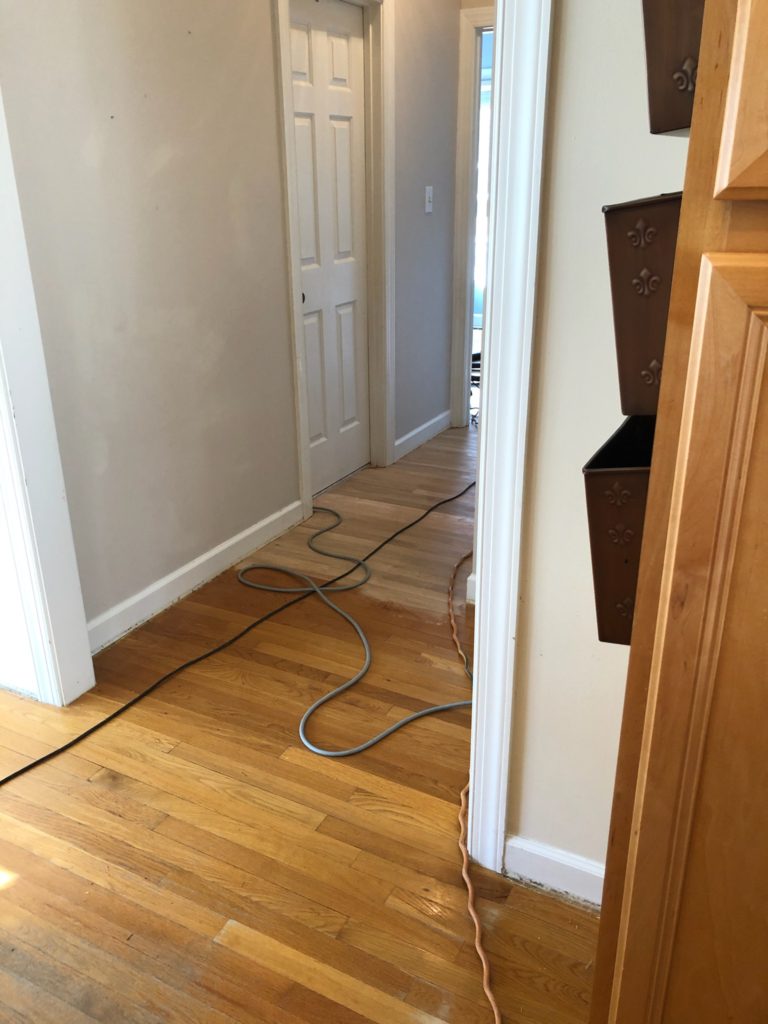
See how orange and beat up the floors were?!
Why now?
We had a leak under our kitchen sink at the end of December and woke up to a puddle on the wood floor in front of the sink. It wasn’t a massive leak, but it was enough to bubble the cabinet and warp the wood floors. Our entire house is wood floors, so in order to fix the warped spot, we needed to refinish all of our floors.
I’ve hated our badly ambered floors since we moved in, but the time, effort, and money it would cost to have them refinished kept this project at the bottom of the priority list. But, enter a leak, and a “never gonna happen” project suddenly became top priority.
Our insurance covered the damage to the downstairs floors and the kitchen cabinet box, but we live in a “no match” state, meaning they aren’t required to make our kitchen cabinets or floors match with the rest of the house. So, basically, we were stuck with refinishing the downstairs floors and replacing the sink cabinet box and staining it all to match the existing cabinet and flooring colors. Our house is over 20 years old, so our once pretty maple cabinets and lighter wood floors are all badly ambered and not attractive at all. There was no way I was going to match freshly refinished floors to our old orange floors!
We decided to just fix the sink cabinet box ourselves instead of replacing it to save cost and then pitch in to have the wood floors throughout the entire house refinished, not just the downstairs. It is quite a process, so we wanted to get all the floors done at the same time. We ended up using the money we had saved for redoing the kid’s bathroom to do the floors and a phase one kitchen project (more on that in another post). So, expect to see a super budget friendly phase one type makeover to their bathroom this year instead of a full remodel! #lifehappens
What’s the process?
Fast forward past all the insurance claims and onto the project! We found an awesome flooring contractor who is fairly priced, has five star reviews for his excellent work, and who is able to finish the floors in five days. Home run! 🙂 To prep, we had to completely move out of our house except for inside the kitchen cabinets, the bathrooms since those are tile, and the built-ins which we were able to tarp and tape off. We’ve been in this house for almost 8 years now, so it was quite a process to declutter and pack up and move out. Thankfully, we only had to move everything into the garage, so there was not no moving truck Tetris to play!
We’ve moved a bunch of times, but hired movers for the first time ever this time to help us move our furniture, fridge, and stove. WHY the heck haven’t we been doing this all along?! Totally worth it! We moved the clothes, bins, and boxes ourselves, so all that was left for the movers was the big, heavy stuff. It only took them an hour and a half since we had already done a lot of the work. Movers are hourly, so we saved a bunch of money moving as much as possible by ourselves!
Where?
We obviously have to be off the floors all week, so we found an Airbnb to stay at nearby. We had originally planned to stay at a hotel, but our kids sleep horribly at hotels all in one room. We get no sleep when we travel and I was dreading trying to make it through a school and work week on no sleep. I decided to do a quick search on Airbnb just in case and found a nice furnished townhome for us to stay at that was comparably priced to a hotel! It’s within 15 minutes of our house and it has been such a gift to stay in a place where our lives are much less disrupted, our kids can have a somewhat normal routine, we don’t have to eat out for every meal, etc. If you’re doing a floor remodel, I’d highly recommend looking on VRBO and Airbnb for local short term rentals!
Progress Report?
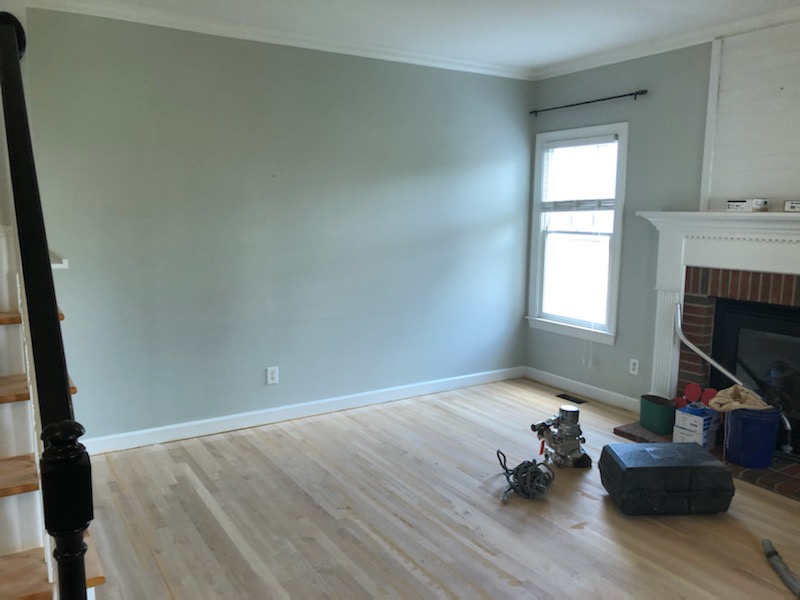
Here’s what’s happened so far! Monday and Tuesday, everything was sanded down and we had to choose a stain color. I can’t even believe how different the house looks already with all that orange stripped away!!!
Diclaimer–these are all quick phone pictures to give you an idea. Some were taken at night and some during the day, so none of them are true to color.
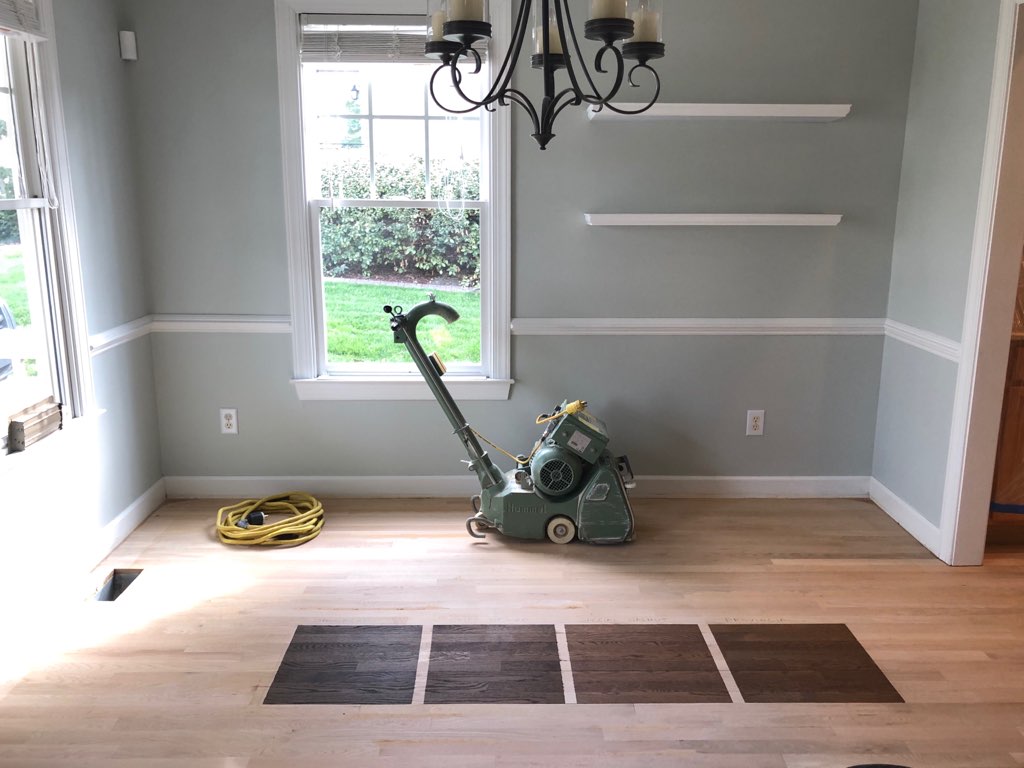
We tested the stains both at night and during the day and landed on Duraseal Provincial (far right). It was just the right color and didn’t have any yellow undertones. We went with a satin top coat, which our flooring contractor said provides some shine, but is not too shiny or matte. Perfect!
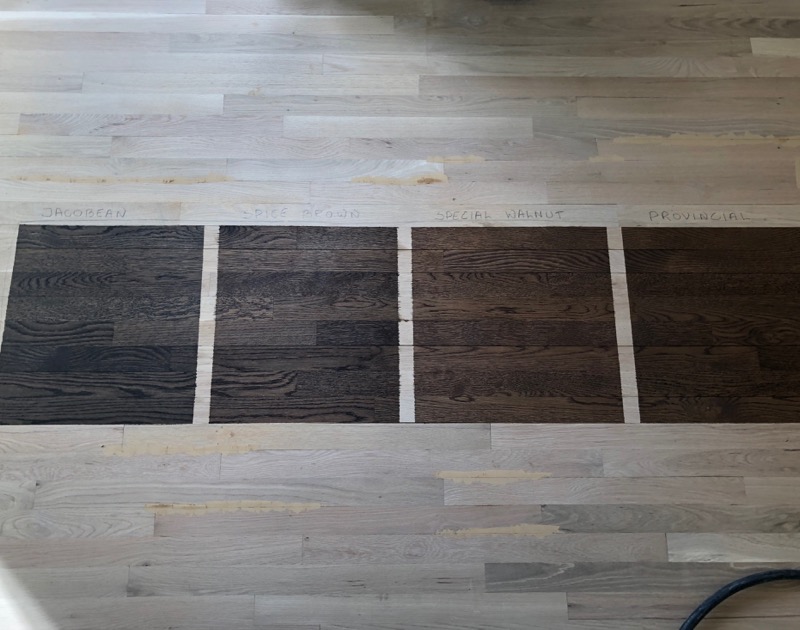
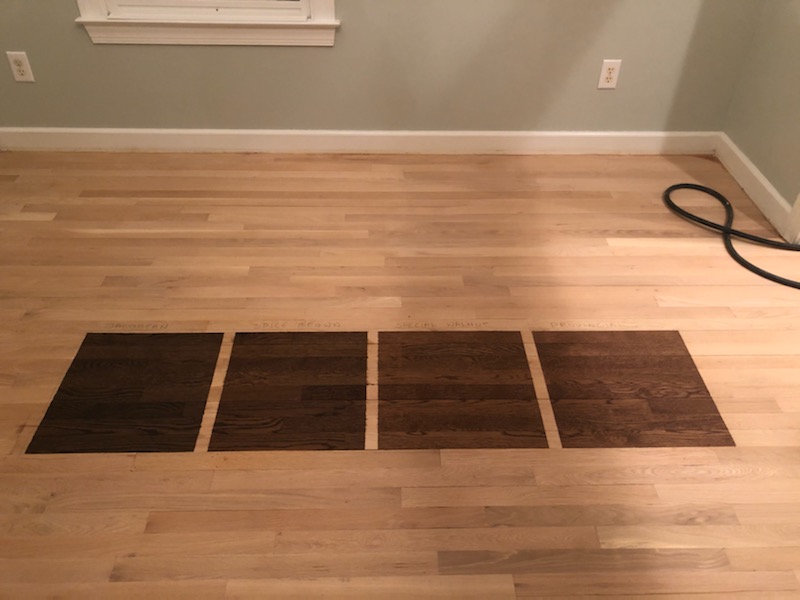
In case you’re wondering why we opted away from the other colors, here were our thoughts…
The far left is Jacobean and is beautiful, but too dark for my taste (Jeremy loved it, though!) and our flooring contractor said it shows dirt and dust very easily. The second from the left is Spice Brown and we weren’t a fan of how dark the stain settled into the wood grain. The third from left is Special Walnut and we really liked it during the day, but it leaned yellow/orange at night.
Wednesday through today (Friday) was staining, top coat, and reinstalling fresh quarter round. I got a little sneak peek as the stain was going down on Wednesday morning and love it so far!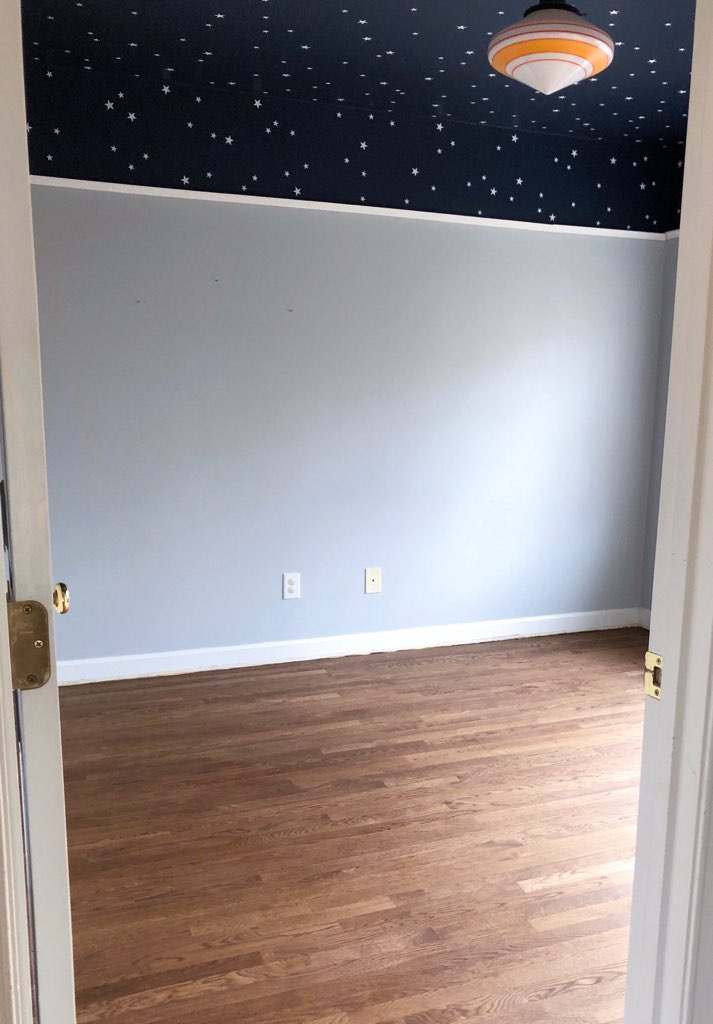
We have our final walk through later today and I’m like a kid waiting for Christmas to come! So excited! We move back in tomorrow! Wahoo! I’ll be back next week with pictures of the finished floors!

Leave a Reply